

Recently we blogged about why paint is a great and inexpensive way to make a big impact on a room. Now that you’ve picked out your colors let’s talk about how to make it all happen. With our step by step interior painting guide, you'll have beautiful walls in no time.
- Gather supplies.
Before you start, make sure you have the proper equipment needed to paint. Here is a list of suggestions:
- Mudding
- Sandpaper
- Sponge
- Soap
- Primer
- Paint
- Paint brushes
- Paint rollers
- Painters’ tape
- Drop cloth
- Paint tray
- Ladder
- Small bucket or bowl
- Prepare your home.
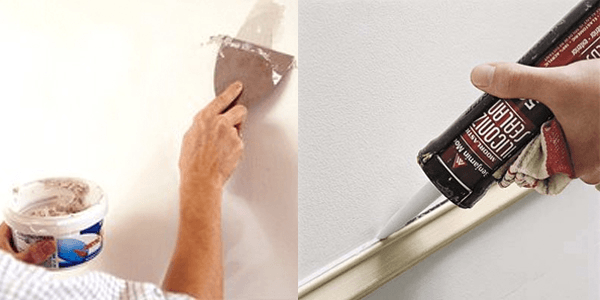
Remove all art, electrical switch covers, and light fixtures from your walls and clear your room of furniture. If you furniture cannot be moved out, move them to the center of the room, and then cover with a drop cloth. While you're at it, secure any pets to avoid accidental paw prints. Protect your floor with additional drop cloths to avoid drippings. Patch any holes and imperfections and sand it smooth. Run a thin bead of caulk over any gaps where molding meets the wall.
- Clean your ceiling and walls.
To ensure there is no dust, dirt, debris, or grease left behind before applying paint, mix water with mild soap and gently clean the walls with a sponge. Rinse walls with clean water to remove soap residue.
- Prime your ceilings and walls.
The primer fills in sponge-like pores and creates an even, solid base that takes paint well. It will also enhance the sheen of your paint. Apply primer before applying color.
- Cut in the ceiling
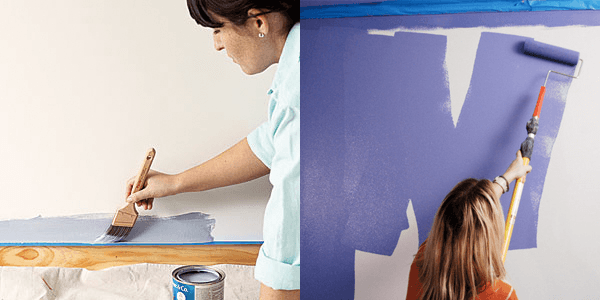
Pour some paint into a small bucket or bowl, and dip a small angled brush 1/3 of the way into the paint. Tap off the excess but do not scrape it against the bucket or bowl. Beginning at the corner of the room and holding the brush as you would a pencil, paint a three to four inch strip of coating around the perimeter of the wall and ceiling with smooth strokes, feathering out the edges to prevent runs. In order to keep a wet edge, don't work in too large an area at one time.
Nervous about making straight lines? Before you start, firmly apply painters’ tape to the edges. Remove immediately before the paint can dry.
- Paint the ceiling.
Start painting near the corner of the room, blending the coating into the ceiling line painted previously. Use a 12-inch roller with a nap length that matches the type of paint and finish you want. Do not overload the roller with paint—fill the well of the roller tray and dip the roller in halfway, and then roll it back onto the tray’s angled platform to remove excess paint.
- Paint the walls.
Once your ceiling is dry, return to the spot where you began painting. Use a trim brush to carefully cut in along the wall-ceiling line. Extend out two to three inches from windows, doors, and moldings.
Once you've cut in around an entire wall area, use a roller to fill in the field with a W or M shape to distribute the bulk of the paint. Then use overlapping vertical strokes to spread paint evenly between the lines. Continue painting in this manner until the wall is covered. Overlap a bit of the cut-in edges to blend away any visible brush marks. Continue in sections until you're finished, painting one wall at a time. Apply another coat after the first coat has dried.
- Painting the Trim
Once the walls are completely dry, place painters’ tape where the trim meets the wall. Paint the moldings, baseboard, and the door and window frames with your angled brush. When painting your trim, paint the tops of the doors and windows first and work your way down so that you can remove any runs as you go. Paint your baseboards last.
- Clean up.
Run each brush under lukewarm water, and then add a few drops of liquid dish soap and continue rinsing. Dislodge dried bits with a metal brush comb. Wrap brushes in paper towels to maintain their shape and lay flat to dry.
Now you can sit back and enjoy the fruits of your labor. Congratulations!
Topics: Love Where You Live, Thompson Tips, Care & Maintenance, interior painting, painting, painting guide, remodeling grand rapids mi, thompsonremodeling.com, Thompson Remodeling, thompson remodeling grand rapids mi
